

Holo-Battle Sim
Solo, open all week. Three elemental courses, four difficulties each, a run that ends on an Omega.
This page

The Holo-Battle Sim is the solo challenge: three elemental courses, four difficulties each, and a roguelite run of 10 or 16 floors that ends on an Omega. Each course names the elements the game recommends against it, first-clear rewards land once per season, and the training incentives reset every week.
Solo, open all week. Three elemental courses, four difficulties each, a run that ends on an Omega.
This page

Four-player squads, Thursday to Sunday, ranked on stars. A different mode, not another name for the Sim.
On the events screenEach course is one element, with the counters the game itself puts on its card. The four difficulties unlock in a chain: each one asks for a Pathfinder rank, and raises the level it is built for.
 Easy
Easy Training of Grass - Easy
First clear
 ×50 Glimmer
  ×500 Safaris
  ×3 Capaseed
  ×100 Breezy Plains Dewdrop Crystal
 Training incentives
Normal Training of Grass - Common
First clear
×50 Glimmer ×750 Safaris ×3 Capaseed  ×6 Flux Crystal
 Training incentives
Hard Training of Grass - Hard
First clear
×100 Glimmer ×1000 Safaris ×3 Capaseed  ×1 Mark of the Strong: Breezy Plains
 Training incentives
 Challenge
 Trial of Grass - Challenge
First clear
×100 Glimmer ×1000 Safaris  ×1 Starcryst Essence ×2 Mark of the Strong: Breezy Plains
 Training incentives
 Easy
Easy Training of Water - Easy
First clear
×50 Glimmer ×500 Safaris ×3 Capaseed ×100 Breezy Plains Dewdrop Crystal Training incentives
Normal Training of Water - Common
First clear
×50 Glimmer ×750 Safaris ×3 Capaseed ×6 Flux Crystal Training incentives
Hard Training of Water - Hard
First clear
×100 Glimmer ×1000 Safaris ×3 Capaseed ×1 Mark of the Strong: Breezy Plains Training incentives
 Challenge
 Trial of Water - Challenge
First clear
×100 Glimmer ×1000 Safaris ×1 Starcryst Essence ×2 Mark of the Strong: Breezy Plains Training incentives
 Easy
Easy Training of Fire - Easy
First clear
×50 Glimmer ×500 Safaris ×3 Capaseed ×100 Breezy Plains Dewdrop Crystal Training incentives
Normal Training of Fire - Common
First clear
×50 Glimmer ×750 Safaris ×3 Capaseed ×6 Flux Crystal Training incentives
Hard Training of Fire - Hard
First clear
×100 Glimmer ×1000 Safaris ×3 Capaseed ×1 Mark of the Strong: Breezy Plains Training incentives
 Challenge
 Trial of Fire - Challenge
First clear
×100 Glimmer ×1000 Safaris ×1 Starcryst Essence ×2 Mark of the Strong: Breezy Plains Training incentives
The game recommends elements, not a roster: what you bring is your call. These are the site’s own tools for making it, and for comparing it with what other Pathfinders ran.

Four slots, every skill and held item, saved in your browser. The builder’s own button then posts it.
Open the team builder
Published teams, most-favourited first, each with the reason its author gives for every slot.
Player teams Publish your own team
A route that will not die, a difficulty that will not budge: bring it to the Discord and someone has already met it.
Join the DiscordA run is a route, not a stage. Easy and Normal lay out ten floors, Hard and Challenge sixteen. Floor four always puts an Alpha in front of you, the floor after it is a rest, and the last floor is the Omega. Everything between is a choice of rooms.
 Regular Battle Regular Battle
  High-Difficulty Battle Regular Battle
  Wealth Event High-Difficulty Battle
  Rest & Recovery Controllable Event Risk event High-Difficulty Battle Wealth Event Regular Battle High-Difficulty Battle High-Difficulty Battle Risk event Rest & Recovery Regular Battle Regular Battle High-Difficulty Battle Regular Battle Wealth Event High-Difficulty Battle Rest & Recovery Controllable Event Wealth Event Risk event High-Difficulty Battle Regular Battle High-Difficulty Battle High-Difficulty Battle Risk event Rest & Recovery Risk event High-Difficulty Battle Wealth Event Regular Battle High-Difficulty Battle Controllable Event Regular Battle High-Difficulty Battle Risk event High-Difficulty Battle
  Unknown Wealth Event Risk event Rest & Recovery Risk event
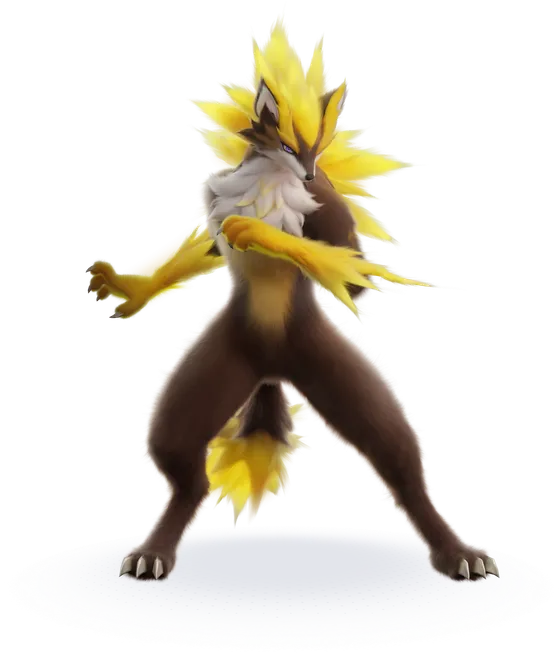
 Floor four is a transformation: you take over an Alpha for the rest of the run, and the game files each one by the job it does. These are the seven the client ships, with its own description of how each plays.



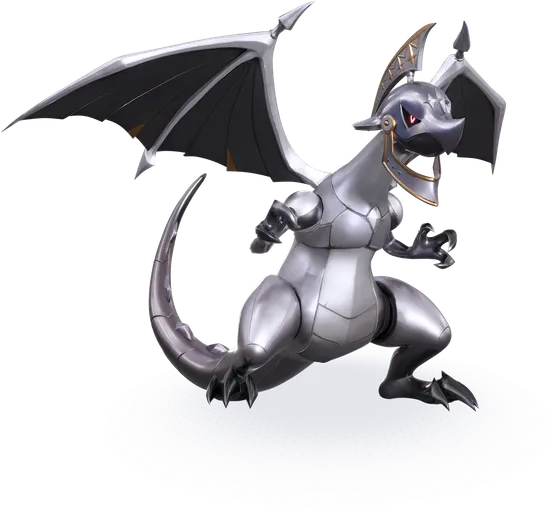
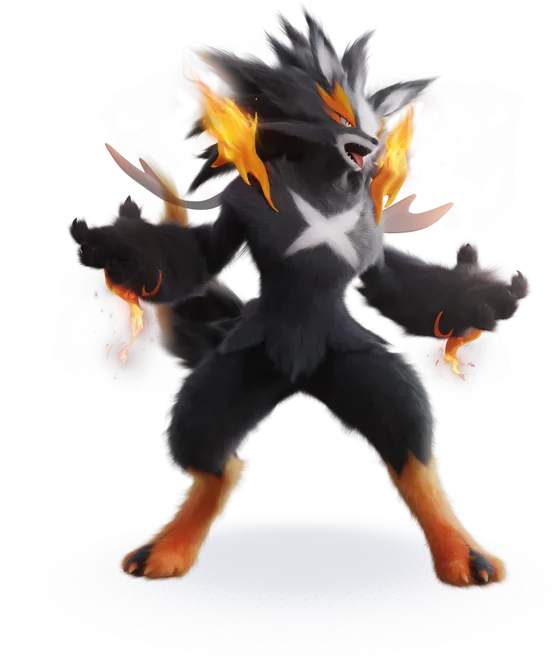

DPS
Alpha Scorchhowl is a DPS-focused Alpha with powerful charged burst attacks and self-damage mechanics. It can pull targets together, then spend HP to unleash a devastating hit.
Sheet
A run ends, the tree stays. 48 nodes, of which 9 unlock something rather than add a number: an extra party slot, a Training Style, a full transformation gauge at the start.

Unlocks an extra party slot.
Cost 200
Unlock the Wealth Training Style.
Cost 300

Grants 500 extra training coin(s) at the start.
Cost 500
When selecting a Holo-gizmo, you can spend 200 Training Coins to reset selection 1 times.
Cost 750

Alpha transformation EP starts at max.
Cost 1200

When you obtain a Holo-gizmo, there is a 20% chance to gain 1 extra Holo-gizmo from a random Training Style.
Cost 1200

Unlocks Quick Training, allowing you to spend Quick Training Passes to complete training instantly.
Cost 1500
Training Coin cost is reduced by 50% when resetting Holo-gizmos.
Cost 3000
When choosing a Training Style, there is a chance for Core Gizmo to appear.
Cost 1500
A fight won hands you a Holo-gizmo; the game sorts them into seven Training Styles, each with six basic gizmos, four advanced ones and one Core Gizmo that grows through two more levels. Every name and line below is the game's own.
“Choose a Training Style and get an initial Holo-gizmo. Holo-gizmos of that style are much more likely to appear in this run.” “When choosing a Training Style, there is a chance for Core Gizmo to appear.” “Collect 3 Gizmos of the same Training Style first to unlock the corresponding Alpha Transformation.”

A Training Style that boosts basic skill damage. Increases the chance to obtain Energy Gizmos.

Increases the BREAK damage of skills by 30%.
Increases the Crit Rate of skills by 20%.
Increases the Crit Damage of skills by 40%.
Recovers 0.6 EP per second.
For each [Energy] holo-gizmo you have, increases Damage Boost of your skills by 2%.
Increases max EP by 10.
When a skill deals damage, all common targets with less than 15% HP remaining and Alphas and Omegas with less than 10% HP remaining will be executed.
After each 6 skill casts, the next sill doesn’t consume EP.
After a skill defeats a target, you will teleport behind another target, recovering … EP, and increasing ATK by … for … seconds, and stacking up to … times.
After each 5 skill casts, gains a shield of … of max HP, lasting for … second(s).
 Core Gizmo [Mk III] Energizing Bracer
 Energizing Bracer α +35% skill damage Every 4 skill casts randomly trigger 1 [Wind Bursts], [Ice Bursts], or [Lightning Bursts].
Energizing Bracer - Final +50% skill damage Every 4 skill casts randomly trigger 1 [Wind Bursts], [Ice Bursts], or [Lightning Bursts]. After a skill deals damage, executes common targets below 10% HP, and Alpha or Omega targets below 5% HP.

A Training Style that boosts Ultimate damage. Increases the chance to obtain Surge Gizmos.

Increases the BREAK damage of the ultimate by 40%.
Increases the Crit Rate of the ultimate by 25%.
Increases the Crit Damage of the ultimate by 50%.
For each [Surge] holo-gizmo you have, increases Damage Boost of the ultimate by 3%.
Recovers 75 UP when a battle begins.
Recovers 1 UP per second.
After each 4 Ultimate casts, the next Ultimate doesn’t cost any UP.
Recovers 10% of max HP after casting the Ultimate.
Casting the Ultimate will consume 10% of your current HP to increase ATK by 15% for … second(s). CD: … seconds.
For each … Ultimate casts during this game, triggers [Surge Engine] random element chain burst for another … time(s).
 Core Gizmo [Mk III] Surge Engine
 Surge Engine α +60% Ultimate damage When an Ultimate is cast, triggers 1 hits of [Wind Burst] and 1 hits of [Ice Burst].
Surge Engine - Final +80% Ultimate damage When an Ultimate is cast, triggers 1 hits of [Wind Burst], 1 hits of [Ice Burst], and 1 hits of [Lightning Burst]. After an Ultimate is cast, restores 20 Ultimate Points over 5s. Cooldown: 20s.

A Training Style that grants buffs while you have a shield. Increases the chance to obtain Defense Gizmos.

Increases both P.DEF and M.DEF by 5% when a shield is active.
Recovers 1 EP per second when a shield is active.
[Reflective Barrier] Permanently increases your max HP by 1% after each 50 Energy Bombs or enhanced Energy Bombs launched.
For each [Defense] holo-gizmo you have, increases the damage of [Reflective Barrier] by ….
Reduces the CD time of all shield skills by 15%.
Increases Break damage by 900% when a shield is active.
[Reflective Barrier] Increases Energy Bombs’ Crit Rate by 35% and Crit Damage by 70%, and 2% of excess Crit Rate will convert into … of Crit Damage.
Increases your damage taken by 25% during the first 15 second(s) of battle. Then increases your HP by 10% and grants a shield of … of your max HP till the end of the battle.
Gains a shield of … of max HP when the battle begins. The shield lasts for … second(s).
Gains Super Armor when a shield is active.
 Core Gizmo [Mk III] Reflective Barrier
 Reflective Barrier α +Every 10s, gains a shield equal to 15% of max HP. While shielded, every 1s or when taking damage, fires 2 energy projectiles at the nearest target, dealing True Damage equal to 3% of own max HP.
Reflective Barrier - Final +Every 10s, gains a shield equal to 20% of max HP. While shielded, every 1s or when taking damage, fires 2 energy projectiles at the nearest target, dealing True Damage equal to 3% of own max HP. For every 50 energy projectiles fired, fires 1 enhanced energy projectile, dealing True Damage equal to 3% of current shield value plus 80% of own max HP.

A Training Style that grants buffs when you receive healing. Increases the chance to obtain Vitality Gizmos.

Increases both P.DEF and M.DEF by … for … second(s) upon receiving healing.
Recovers 1 EP upon receiving healing. CD time: 0.5 seconds.
[Repair Matrix] Permanently increases your healing amount by 1% for each 50 pulse(s) you launch or bounce away.
Increases the damage of [Repair Matrix] by … for each [Vitality] holo-gizmo you have.
Reduces the CD time of all healing skills by 15%.
There is a 25% chance of dropping a healing item that restores … of max HP when defeating a target.
… of overhealing will be converted into a shield capped at … of your max HP, lasting for … second(s).
Increases Damage Reduction by … when your HP is lower 50%.
Increases the number of bounces of [Repair Matrix] by ….
Recovers … of max HP within 30 second(s) when your HP is lower than 30%. CD time: … seconds.
 Core Gizmo [Mk III] Repair Matrix
 Repair Matrix α +Restores 5% max HP every 5s. When receiving healing, fires 3 pulses at the nearest target, dealing True Damage equal to 55% of healing received plus 1% of max HP. The pulse ricochets up to 4 times. If there is only one target, it can ricochet between the target and the player.
Repair Matrix - Final +Restores 6% max HP every 5s. When receiving healing, fires 5 pulses at the nearest target, dealing True Damage equal to 70% of healing received plus 1% of max HP. The pulse ricochets up to 5 times. If there is only one target, it can ricochet between the target and the player.

A Training Style that boosts defense in combat. Increases the chance to obtain Ironclad Gizmos.

Increases your max HP by 20%.
Increases both P.DEF and M.DEF by 1 for each 5 max HP you have.
[Flamewreath Armor] Permanently increases Damage Boost of [Core Gizmo] by 1% after you deal damage 20 time(s).
Increases the Crit Rate of [Core Gizmo] by … each time you take damage, stacking up to … time(s).
Increases the damage of [Flamewreath Armor] by … for each [Ironclad] holo-gizmo you have.
Increases both P.DEF and M.DEF by … (capped at …) every 5 second(s) after the battle begins.
Increases the radius of [Flamewreath Armor] by …m.
Reduces ATK of the target by 5% when you are under attack, lasting for … second(s).
Recovers 5% of max HP for each 10 hit(s) taken.
Gains … point(s) of Damage Reduction for each 0.03 point(s) of P.DEF and M.DEF you have.
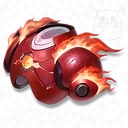 Core Gizmo [Mk III] Flamewreath Armor
 Flamewreath Armor α +15% P.DEF and M.DEF Every 1s, deals True Damage equal to 1% of P.DEF and M.DEF to targets within …m and applies 1 stacks of [Scorching]. Stacks up to 10 times and lasts 10s. When [Scorching] reaches max stacks or the target is defeated, it explodes, dealing True Damage equal to 4% of P.DEF and M.DEF to nearby targets and applying 1 stacks of [Scorching].
Flamewreath Armor - Final +25% P.DEF and M.DEF Every 0.6s, deals True Damage equal to 1% of P.DEF and M.DEF to targets within …m and applies 1 stacks of [Scorching]. Stacks up to 10 times and lasts 10s. When [Scorching] reaches max stacks or the target is defeated, it explodes, dealing True Damage equal to 4% of P.DEF and M.DEF to nearby targets and applying 1 stacks of [Scorching]. All [Core Gizmo] damage applies … stacks of [Scorching].

A Training Style that increases damage as you take more damage. Increases the chance to obtain Valor Gizmos.

Boosts your Damage Boost by 10% for each 20% of HP lost. The Damage Boost will gain another … boost and cap when your HP drops to ….
Increases the shield amount you receive by 12% for each 25% of HP lost. The shield amount increase will gain another … boost and cap when your HP drops to ….
Increases your healing amount by 12% for each 25% of HP lost. The healing amount increase will gain another … boost and cap when your HP drops to ….
Becomes Invincible for 1 second(s) when you take lethal damage. CD time: 0.5 seconds.
Increases ATK by 1% for every [Valor] holo-gizmo you have.
Converts 50% of all damage taken into final damage which will be dealt within 5 second(s).
Recovers 5 EP each time you take a hit. CD time: 60 seconds.
Increases your Crit Rate by … each time you take damage, lasting for … second(s) and stacking up to … time(s).
Increases your Crit Damage by … each time you take damage, lasting for … second(s) and stacking up to … time(s).
Receives a shield of 60% of max HP for … second(s) when your remaining HP is lower than 25%. CD time: … second(s).
 Core Gizmo [Mk III] Fervor Mask
 Fervor Mask α +8% damage reduction Recoverable HP becomes 50% of max HP, and ATK increases by 7%. Every 50 hits taken triggers a wide-area True Damage hit equal to 20% of ATK, and grants 15% Siphon plus a shield equal to 10% of max HP for 20s.
Fervor Mask - Final +12% damage reduction Recoverable HP becomes 50% of max HP, and ATK increases by 10%. Every 30 hits taken triggers a wide-area True Damage hit equal to 30% of ATK, and grants 15% Siphon, a shield equal to 15% of max HP, and 25% Damage Amp for 20s.

A Training Style that spends Training Coins to attack. Increases the chance to obtain Wealth Gizmos.

Allows you to put together a [Simple Holo Lotto] after collecting all the Holo Lotto parts.
Allows you to put together a [Simple Holo Lotto] after collecting all the Holo Lotto parts.
Lowers the price of each item in the shop by 15 Training Coins for each [Wealth] homo-gizmo you have.
There is a … chance to earn … gold coin(s) when you take damage in the first … second(s) of battle.
There is a … chance to earn … gold coin(s) when you deal damage in the first … second(s) of battle.
Allows you to put together a [Simple Holo Lotto] after collecting all the Holo Lotto parts.
Defeating a common target has a 20% chance to grant 2 Coins. Defeating an Alpha or Omega has a … chance to grant 100 Coins.
Increases the Crit Rate of [Core Gizmo] by 3% if you have earned more than 1000 Training Coins in this game.
Increases the Crit Damage of [Core Gizmo] by 6% each time you earn 1000 Training Coins in this game.
[Predictive Dice] For each gold coin launched, consumes … training coins and increases the damage of [Predictive Dice] by …. The skill will not be activated if you don’t have enough training coins.
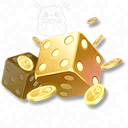 Core Gizmo [Mk III] Predictive Dice
 Predictive Dice α +20% Training Coin earnings During this training, for every 200 Training Coins obtained, 1 floating Training Coin will be generated around you, up to 15 total, with a cooldown of 15s. Each Training Coin deals True Damage equal to 70% of ATK.
Predictive Dice: Final +30% Training Coin earnings During this training, for every 200 Training Coins obtained, 1 floating Training Coin will be generated around you, up to 20 total, with a cooldown of 15s. Each Training Coin deals True Damage equal to 70% of ATK, and each hit has a 10% chance to drop … Training Coins. Picking up dropped Training Coins reduces [Predictive Dice] cooldown by …s.
An eighth style ships locked in the launch client, with no gizmo behind it yet:  Chaos · Chaos Device
An ellipsis marks a value the client's table does not hold for that gizmo.
The traits a room can put on its enemies, in the game's words:

Damage Reduction increases by 15%.

Increases ATK by 30%.
Physical damage reduction increases by 20%.
Magical damage reduction increases by 20%.

At 50% HP, gains a shield equal to 30% of max HP.
At 20% HP, rapidly restores 30% HP over 5s.

Launches a slowing field when defeated.
Generates a healing field when defeated.
Self-detonates when defeated.
On defeat, the nearest target gains a shield equal to 15% of HP and a 15% ATK boost.
Gains a shield equal to 5% of max HP when dealing damage.
When dealing damage, applies 5s of damage over time and reduces healing efficiency by 35%.
When dealing damage, applies 5s of damage over time and slows by 25%.
Three clocks run at once: first-clear rewards once per season, training incentives every week, and a task list every day.
A season runs about 41 days, and only then do the first-clear rewards come back. These are the windows the client ships, in your server’s own time.
The lit season is the one running now, on the European servers.
The Omega at the end of a run pays points, and the points pay out in tiers.
The list the mode asks for every day, in the game’s own words.
 Clear all Common training stages Clear 1 Hard training stage Clear 2 Hard training stages Clear all Hard training stages Complete any 1 type of Advanced Training Complete any 2 types of Advanced Training Complete all types of Advanced Training
 Rolled at claim time, so the client does not carry the list.
Skipping the run Once a difficulty is cleared, it can be swept instead of played: 30 stamina and 1 ticket per sweep.
No. The Sim is a solo challenge, open all week, split by element into four difficulties. The Interlink is a four-player team challenge that runs Thursday to Sunday and ranks squads on their star grade. They are two separate modes with two separate tabs in the in-game Events screen.
Three: Grass, Water and Fire, each with four difficulties (Easy, Normal, Hard and a Challenge tier that is its own trial). That is twelve runs in total.
For the rewards, no. Clearing the highest difficulty hands you the training incentives of every difficulty below it, so the efficient route is the hardest one you can actually finish. The first-clear rewards are still per difficulty, and each difficulty still asks for its own Pathfinder rank before it opens.
Training incentives reset every week. First-clear rewards are once per season, and a season runs about six weeks.
Easy is built for level 50, Normal for 55, Hard for 60 and the Challenge tier for 63. Each course also names the elements it recommends you bring.

 Fire
Fire Wind
Wind Dark
Dark ×30
×30  ×100000
  ×60
×60  ×1
×1  ×2
×2  ×3
×3 
 Grass
Grass Lightning
 Ice
Ice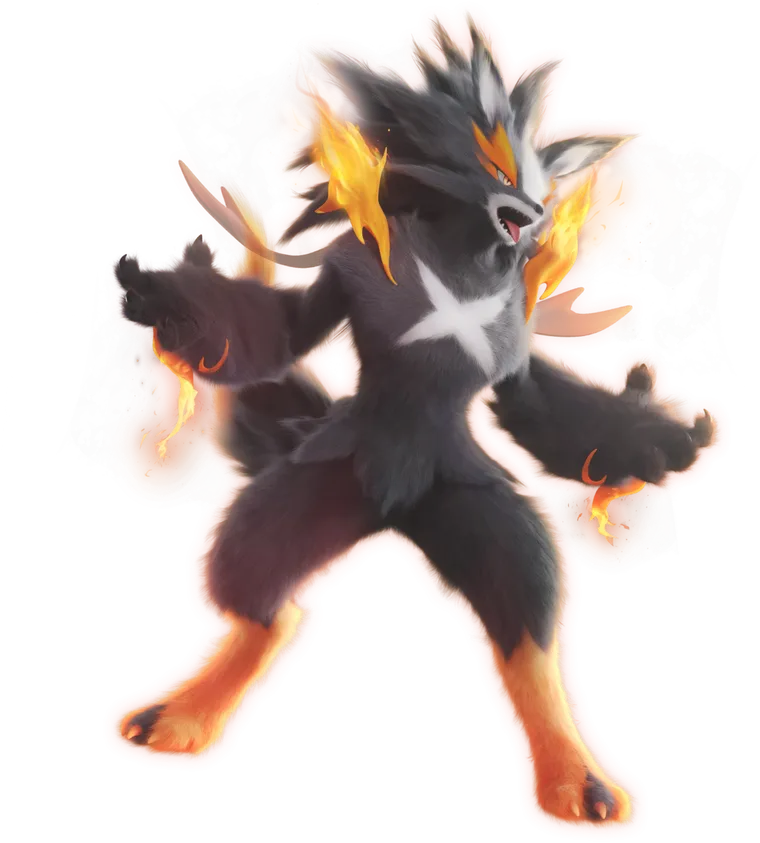
 Water
Water Earth
Earth





 ×200
×200  ×2
×2  ×5
×5